
The Odoo QuickBooks Online Connector PRO synchronizes contacts both ways: QuickBooks Online customers and vendors are imported into Odoo, and Odoo contacts are exported to QuickBooks Online.
Import contacts from QuickBooks Online into Odoo
1. Import the QuickBooks customers and vendors
Open the connection, click Initial Import and click Partners (or All).
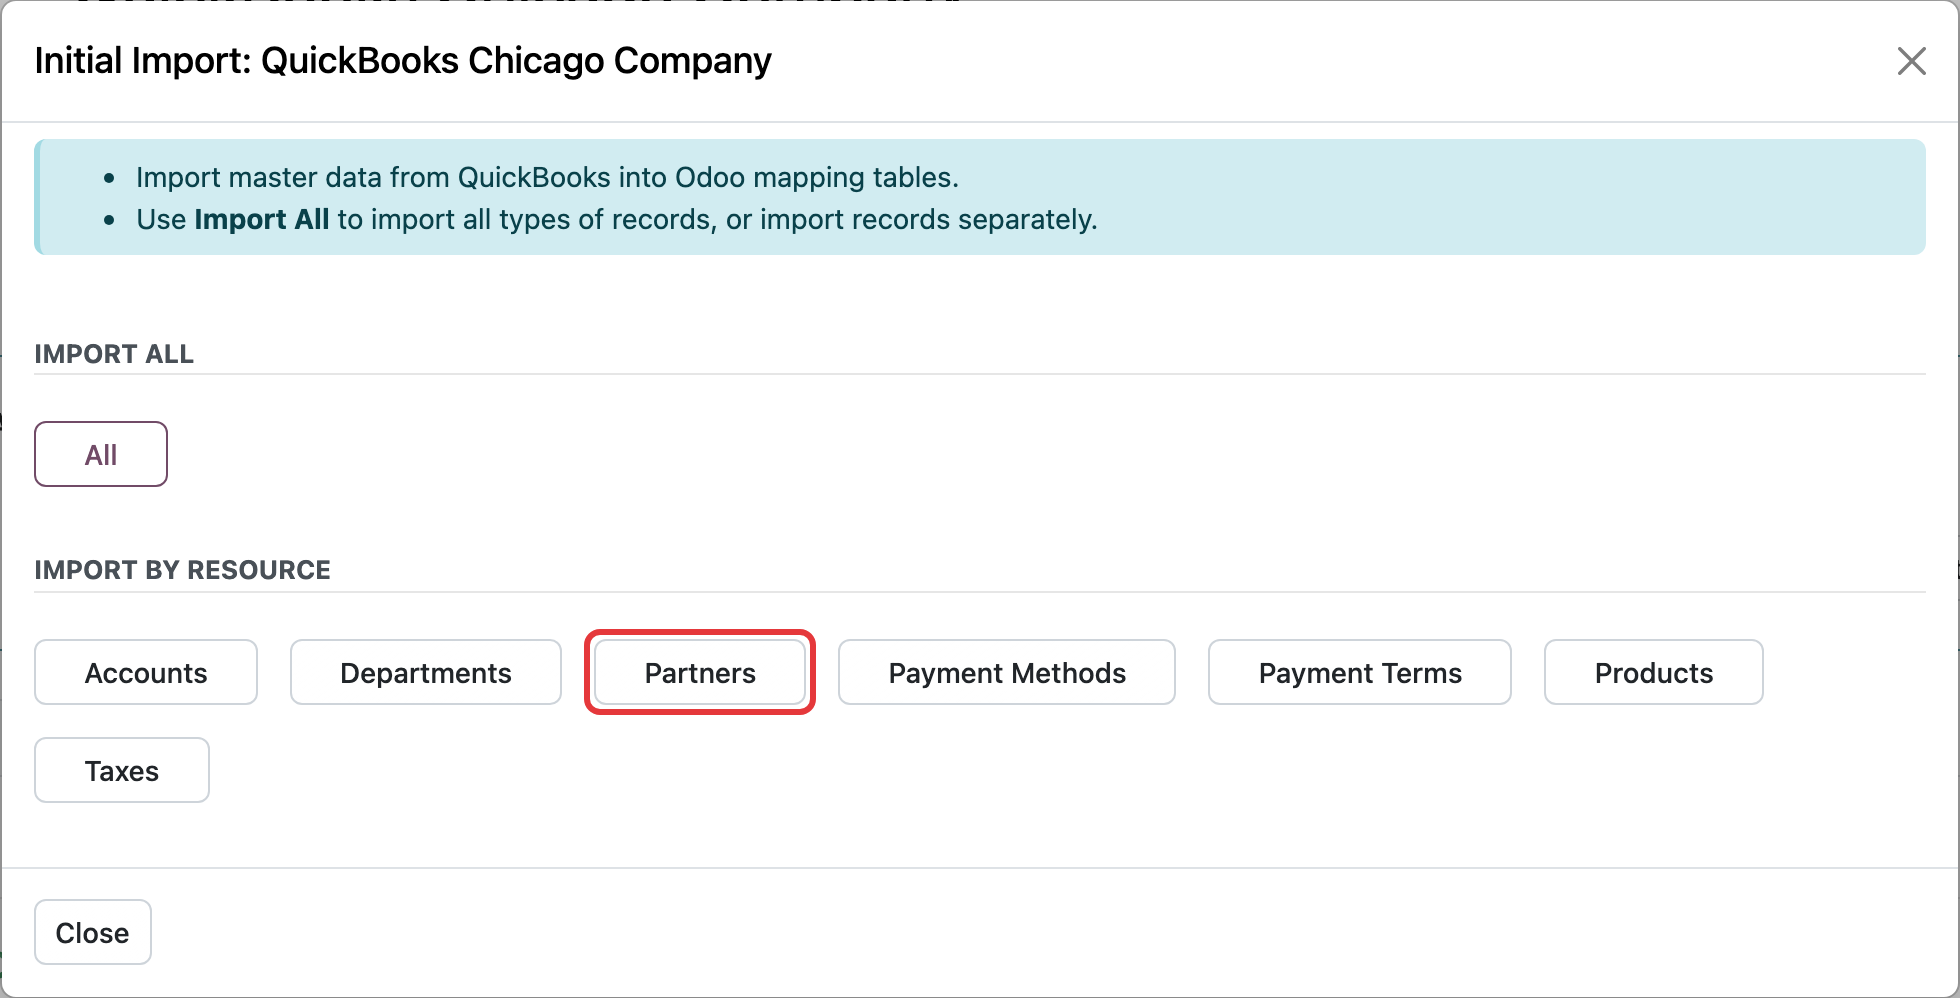
This loads your QuickBooks Online customers and vendors into QuickBooks Online → Mappings → Partners. At this point they are mappings only: the Odoo contacts are not created yet.
2. Link or create the Odoo contacts
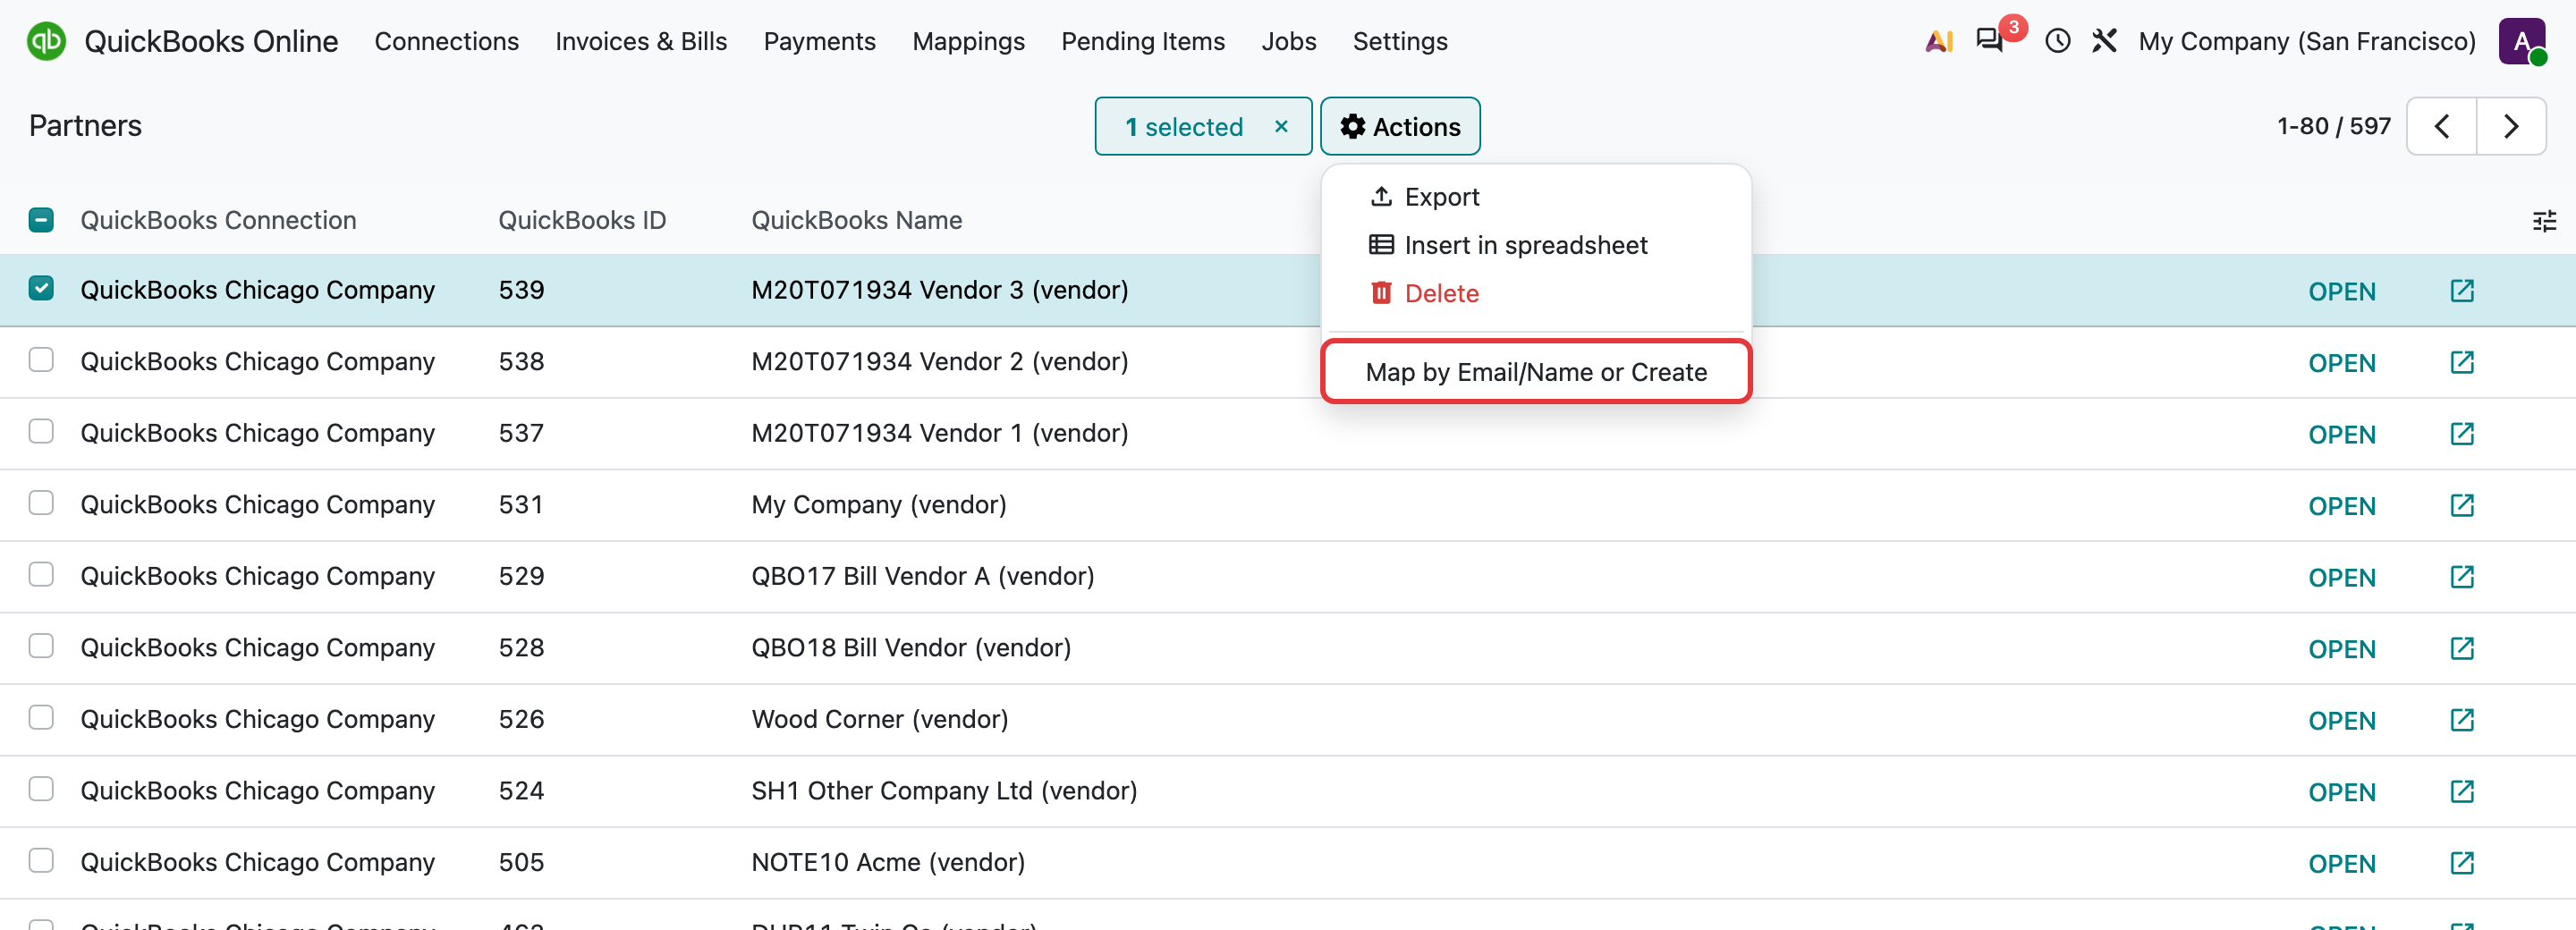
In Mappings → Partners, the Not Mapped filter shows the records without an Odoo contact. For each record you can:
-
Link it automatically: select the records and choose Actions → Map by Email/Name or Create. The connector looks for an Odoo contact with the same email and name, and creates a new contact if none is found.
-
Link it manually: set the Odoo contact on the mapping line yourself.
Export contacts from Odoo to QuickBooks Online
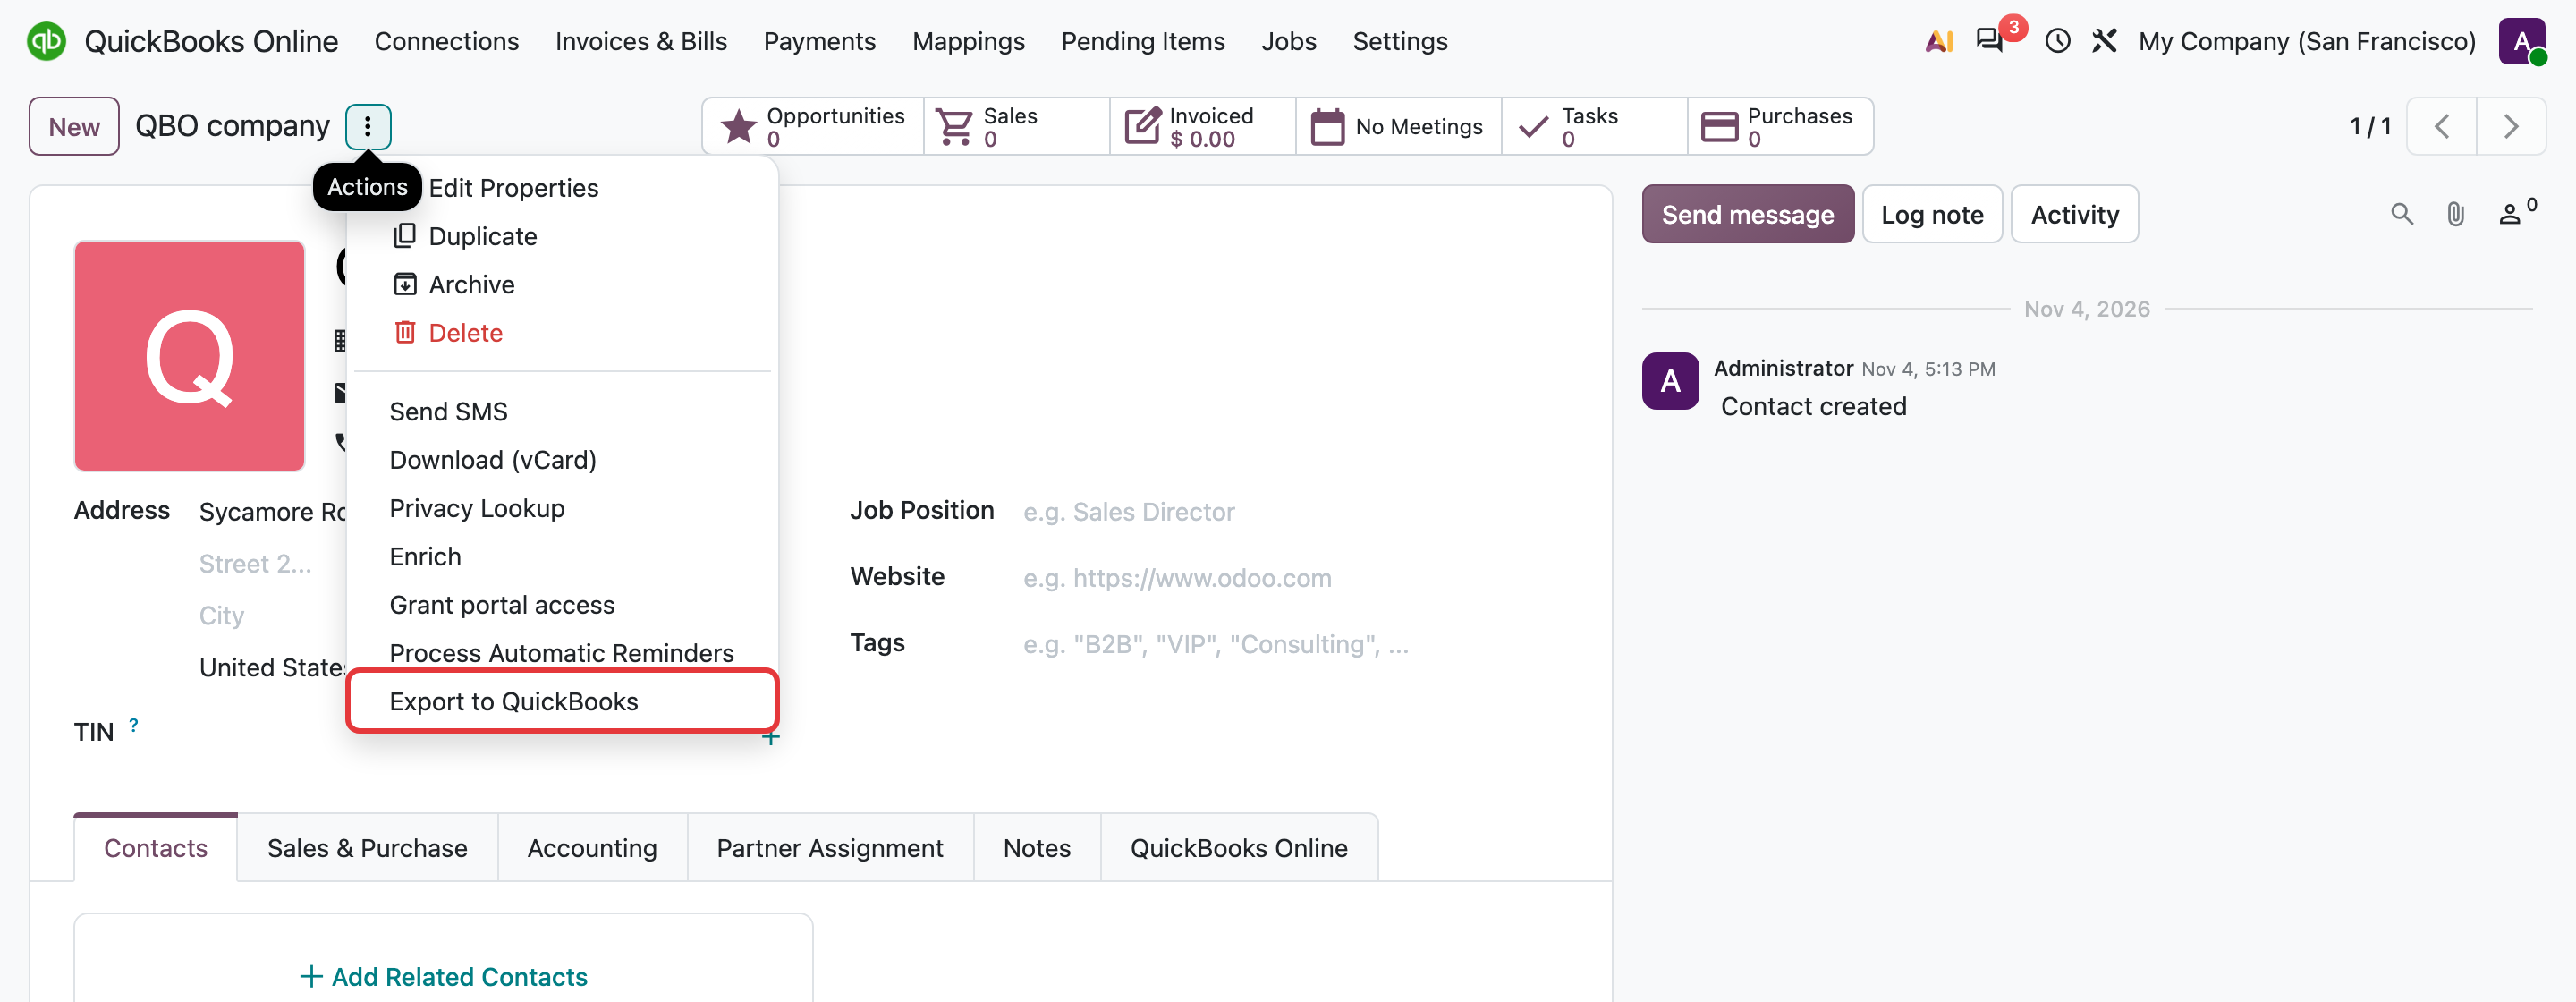
Open the contact, click the ⚙ Actions menu and choose Export to QuickBooks. You can also select several contacts in the list view and export them at once.
Choose how the contact is created in QuickBooks Online: Customer, Vendor or Both of them, and click Export.

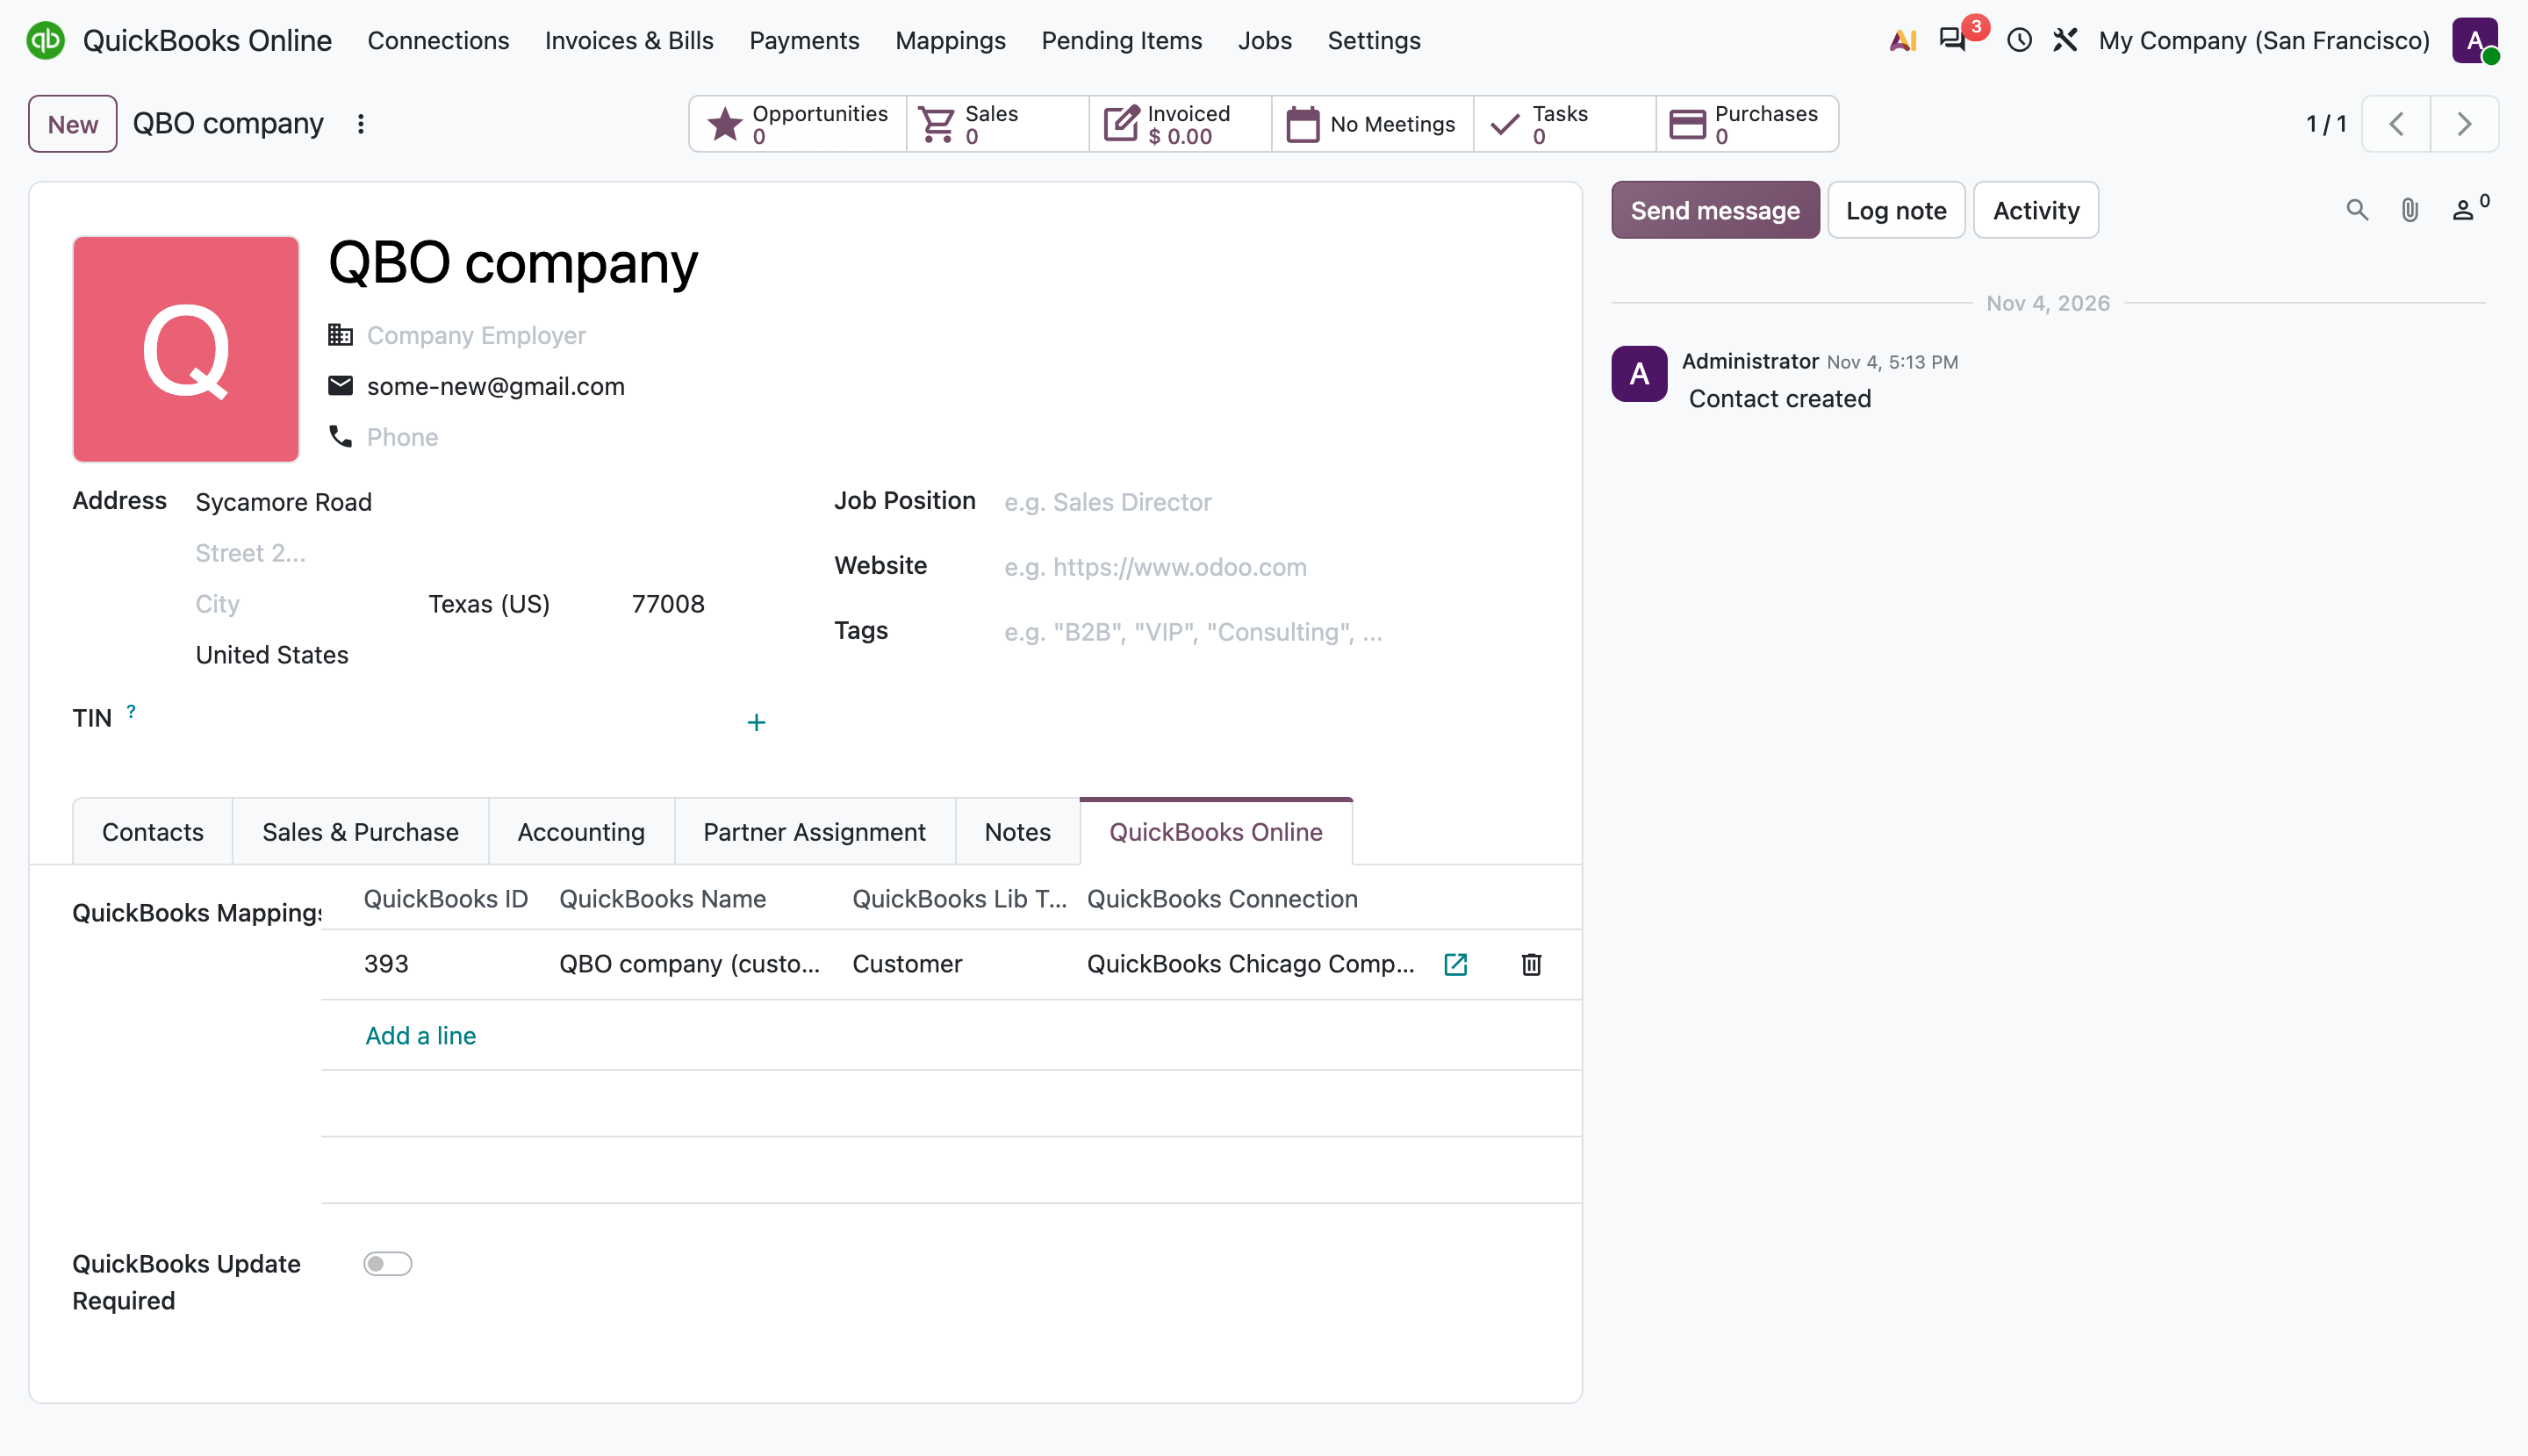
The export runs as a job in the background. After it finishes, the contact’s QuickBooks Online tab shows its QuickBooks ID, name, type (customer or vendor) and connection.
Keep contacts up to date automatically
On the connection’s Misc tab, turn on Automatic Updates to QuickBooks and Allow Partners Updates: changes to contacts that are already in QuickBooks Online, such as a new address or email, are then sent automatically.
More: How to automatically synchronize data between QuickBooks Online and Odoo · Configuration of the QuickBooks Online Connector